Bidet Seat Installation FAQs
- Choose the right seat: Measure your toilet (round or elongated) and ensure access to a GFCI outlet for electric models.
- Prep the area: Turn off the water supply and flush the toilet to empty the tank.
- Remove old seat: Use a screwdriver to detach the existing toilet seat and clean the mounting area.
- Install mounting plate: Align and secure the bidet seat’s mounting plate using included bolts and brackets.
- Connect water supply: Attach the T-valve to the toilet tank, then connect the bidet hose and water supply line.
- Check for leaks: Turn the water back on, tighten connections as needed, and use Teflon tape if necessary.
- Plug in and test: For electric models, plug into a GFCI outlet and test the bidet functions.
Washing with a bidet offers all sorts of benefits for your health and the environment. Some of those perks include boosting hygiene and saving toilet paper—but (no pun intended) are bidets easy to install?
It’s a fair question since installing a bidet wasn’t always so simple. In the past, standalone bidets were the only option. These separate bathroom fixtures were quite the project, requiring new pipes, ample bathroom space, and a plumber.
These days, bidets are much easier to install—thanks to bidet toilet seats. These add-ons convert your toilet to a bidet, rather than existing as a separate fixture. For that reason, they can be installed by pretty much anyone without a plumber or any special skills.
What tools do I need to install a bidet toilet seat?
Adding a bidet to a toilet shouldn’t require purchasing extra tools. Most models include all of the parts needed to connect to your toilet and call for a few basic tools:
- phillips-head or standard screwdriver to remove your old toilet seat
- small towel or bucket to catch any residual water
- adjustable wrench to loosen or tighten plumbing connections

How to turn a toilet into a bidet in 6 steps
Step 1. Get a bidet toilet seat that fits your toilet
In general, toilets come in 2 sizes: round and elongated. To figure out which size you have, grab a tape measure and measure your toilet using our Fit and Measurement Guide.
Once you’ve confirmed the size of your toilet, you’re ready to start shopping. Our easy-to-install bidet toilet seats come in both elongated and round sizes for every budget and preference.
Note: Most bidet toilet seats require electricity, so make sure that your toilet is within reach of a GFCI outlet. (Bidet electrical cords are usually between 3.5 and 4 feet long.) If electricity isn’t an option, consider one of our non-electric models, like the EcoSeat S102.
Step 2. Turn off the water supply valve
Now that you’ve chosen a bidet toilet seat, let’s begin the installation process.
Start by turning off the water supply valve behind your toilet and flushing your toilet to remove any remaining water. (While this seems like common sense, it’s easy to forget.)
Step 3: Remove your existing toilet seat
Lift the hinge covers and remove the mounting bolts that hold your toilet seat in place. (This is where that screwdriver comes in handy.) Set the mounting bolts aside because you’ll need them later. Wipe down the seat-mounting area with bathroom cleaner and a paper towel or cloth.
Note: Having trouble accessing the mounting bolts from underneath your toilet? Your toilet may require top mount installation. In that case, you’ll need to purchase top mount hardware. To learn more, check out our top mount installation instructions.
Step 4. Attach the bidet seat mounting plate
Most bidet toilet seats use a mounting plate to install on your toilet. Installation may vary—but in general, all you’ll have to do is place the plate over your toilet’s bolt holes, and insert the brackets and mounting bolts.
Hand-tighten the mounting bolts, and slide the bidet seat onto the plate. You may need to adjust the position of the mounting plate to better align with your toilet.
Check out this video of our Swash 1400 for a more detailed look at the installation process.
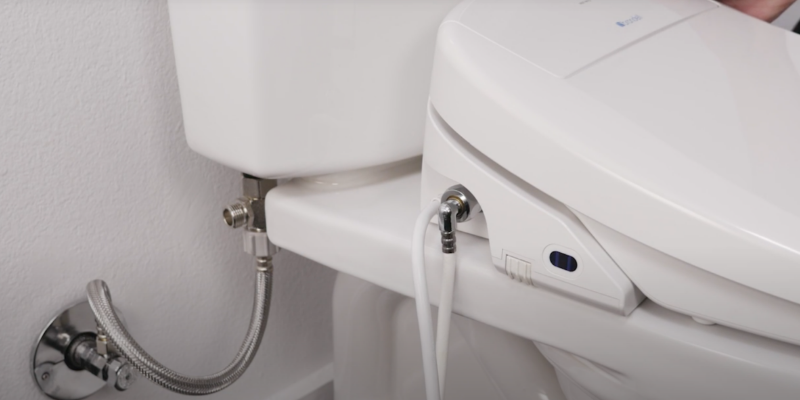
Step 5. Connect the water supply
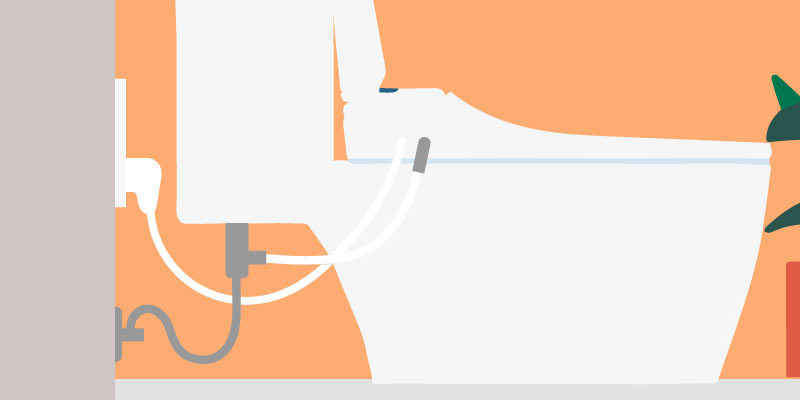
Bidet toilet seats wash your bum with water—so the next logical question is, where does the water in the bidet come from?
Bidet toilet seats utilize your toilet’s fresh water using a hose and a plumbing connector called a T-Valve. Everything you need to do this should be included with your bidet (minus an adjustable wrench).
If this process sounds complicated, don’t worry. It’s actually quite easy and shouldn’t take long to complete whether you consider yourself a handy person or not.
Start by checking that you’ve turned off the water supply valve and completely flushed your toilet. Don’t skip this step as it ensures you won’t flood your bathroom with water.
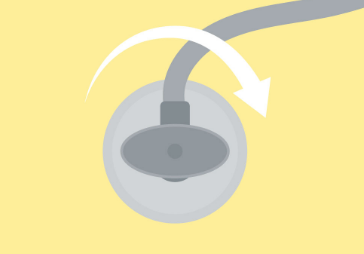
Next, locate your toilet’s water supply line that connects your toilet to the plumbing. Follow to where the water supply line connects to your toilet and unscrew it using an adjustable wrench. It may drip a little—so be sure to have a bucket or towel ready.
Screw on the T-Valve directly to the toilet tank where the water supply line was connected. (If your bidet came with a washer or 2, make sure those are secure in the T-Valve.) Then, connect the water supply line to the bottom of the T-Valve.
Finally, connect the bidet hose to the T-Valve and the bidet seat, tightening all connections until they’re secure.
Note: This step requires a flexible water supply line. If you have a rigid water supply line, you can purchase a flexible one online or at any major hardware store.
Step 6. Check for leaks
Turn on the water supply and check for any leaks. If leaking occurs—don’t panic. Simply turn off the water supply and check that the connections are properly tightened. Wrapping Teflon tape (a.k.a. plumber’s tape) around threaded connections might do the trick.
Once your bidet is leak-free, it’s time to plug it into a GFCI outlet. Or, skip this step if you have a non-electric bidet toilet seat.
Need more installation support?
You can totally install a bidet toilet seat all by yourself. That said, if you need some help, consider TaskRabbit. This same-day service platform will help connect you with a handy individual—a “Tasker”—to get your bidet up and running.
Still have questions? Get an installation refresher from our Help Center. There you’ll find videos, FAQs, user manuals, and more.